Learning Unity — Dynamic GameObject Movement

One of the most basic activities you’ll want to be able to perform when making something in Unity is that you’ll want objects to move. Whether we’re talking about the player, the enemies, or even objects in the background virtually all games involve movement of some kind. In this article, we’re going to go over the basics of making objects move in Unity.
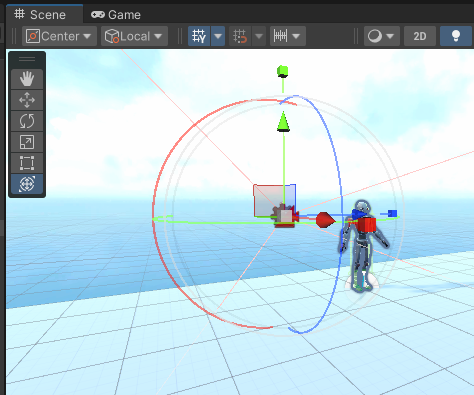
Within your Unity project create a 3D object, such as a cube or sphere, and add it to your Scene. Naturally, you can move this object by either manually manipulating the values of the object’s Transform or by making use of the Editor’s Move Tool.

But we’re interested in moving the object dynamically, without manually manipulating it through the Editor. For that, we will need a script.
In the Inspector window for the object, click the “Add Component” button and find the option to add a new script. After giving the script an appropriate name, you will see that a new script has been added to your Assets folder and that it is already linked to your object.
You’ll next want to open the script in order to edit it. Unity’s scripts are in the C# language, so if you have an editor capable of working with C# you will be able to work on your scripts there. If you don’t have one already, I recommend trying Visual Studio. The Community version is free to use.
Learning C# itself is beyond the scope of this article, but there are many resources to be found on the internet if you are interested in doing that.
Once you have the script open, you should see a class with two empty methods — Start and Update. The comments in the script explain the purpose of these two methods: Start runs once on the instantiation of the object and Update runs once every frame for as long as the object exists.
For our most simple example of movement, we’re just going to have our object move to another location.

This can be fairly easily accomplished in the script. In either Start or Update, you can set the position of the object directly.

Let us look more closely at this line of code. First, we have a transform. All GameObjects in Unity have a transform, and this transform, in particular, would be referring to the transform of the object that this script has been attached to. In this case, it would be the sphere that I had created earlier. This is the same transform that you can see in the Editor’s Inspector window. As you can see there, the transform handles the position, rotation, and scale of the object.
The next part of the code shows that we are working with the position of the transform. This value takes a Vector3, which is basically a collection of three float values. In the case of the transform’s position, these three float values represent the x, y, and z coordinates of the object.
So with the line of code above we are moving the object from its initial position (x:0 y:0 z:0 by default) to a new position at x:5 y:0 z:0.
Because this code is in the Start method, it will run only once and the object will move immediately to the position specified in the script. If the code was put in the Update method instead, the script would be constantly “moving” the object to the specified position. It would become impossible to move the object to a different location. Let’s now look at a slight modification to this code.

With this change, instead of setting the position of the object to x:5 y:0 z:0 the script instead shifts the object five units along the x-axis. For example, if your object starts at position x: 2 y:3 z:0 the script will move it to x:7 y:3 z:0.
If we put this code in the Update method instead then things get interesting. Since Update is run every frame, that means the position of the object will shift by five units along the x-axis on every frame. If you run this code, you would see your object shoot out of view very quickly. Let’s make another small change to this code so we can see the effect more clearly.

With this change, we are only moving the object by .05 units every frame. At that rate, we can actually see its progress.

That’s much better! It even starts to give us the illusion of natural movement. But Unity has an even better means of displaying smooth movement — the Translate method.

Switching to the Translate method we get a very similar result, but the advantage of the Translate method is that it is professionally developed code from Unity itself. It has several overloads that could be useful when your projects become more complex.
There’s one problem with this code though, and that is that the Update method is based on “frames”. This is a problem because how long a frame is could vary between different hardware. This problem can be solved with the Time class. The Time class allows you to get information about, well, time. That includes the amount of time that passes between frames.

By multiplying the direction vector by the deltaTime value you should see a more consistent speed. You might notice that I also increased the value in the direction vector. .05 would actually be very slow once deltaTime is involved.
Hopefully, that gave you a good starting point for learning about movement in Unity. Good luck and happy coding!