Galaxy Shooter — Homing Missile Powerup

Greetings, and welcome to this special series of articles. In this series, the intention is to take a solid functional base game and add some extra features that (hopefully) make it just a little more special.
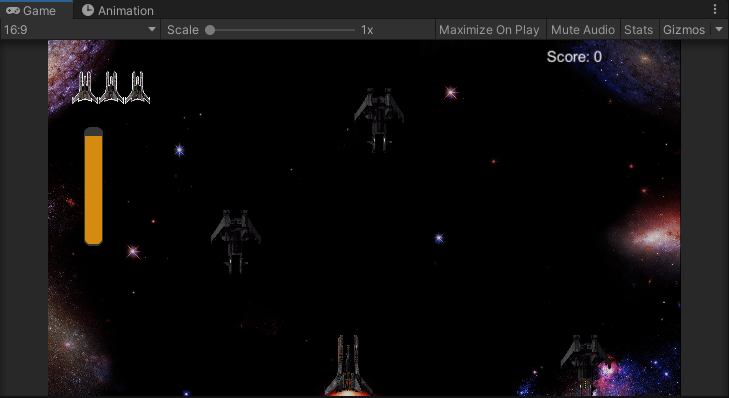
The base game we have here is called Galaxy Shooter. It’s a Galaga-style 2D shmup that I put together while going through the 2D Game Development course for GameDevHQ. It has a controllable player ship, enemies, powerups, sound effects, music, and more. It is, as stated above, a fully functional game that can already be played and enjoyed in its current state.
But let’s see what else we can make it do.
We’ve been working on creating a new powerup that changes the player’s weapon to become a missile that changes its own course to try to hit enemies. In the last article, we revamped the powerup spawn system to allow some powerups to be more rarely spawned than others. That system is now in place, so it’s time to implement the new powerup itself.
The initial state and the path forward
As the game stands currently, the player’s weapons consist of “lasers” that travel in a straight line from where they are fired. Also, due to our work in a previous article, the ammo for the player’s weapon is limited and needs to be replenished through another obtainable powerup.
With the homing missile upgrade, we’re looking to create a projectile that locks onto the nearest enemy and adjusts its own path trying to hit that enemy. The tricky part to this is to make it convincing. It’s not difficult to script an object to always move towards another object. What we need to do is make certain that the missile appears to be acting like a missile. For example, it should not be moving in reverse or turning on a dime.
In addition, since it is meant to be a rare and powerful collectable, it seems appropriate to disable the limited ammo aspect for the duration of the powerup. It will be limited already by the temporary nature of the powerup and the cooldown time for the player’s weapon.
Creating the assets
Naturally, in order to have a missile for the player to fire, we’ll need a missile. I revealed before that visual arts are not my forte, but I gave this my best effort.
I knew that I wanted my missile to have the appearance of being three-dimensional, but I also knew that I didn’t possess the skills to create this illusion from scratch. Thinking on how to overcome this problem, I came upon an idea — I could create a 3d model and then take a 2d snapshot of it.
Unfortunately, I had no more experience with 3d modelling than I did with graphic arts. I decided to give it a shot regardless, and with a quick search of the internet, I discovered a simple web-based tool for putting together 3d models called TinkerCAD.

I was able to figure out TinkerCAD fairly quickly and put together what I wanted my missile to look like. Once I had the model finished in TinkerCAD, I took a screenshot from a profile view. Then with that screenshot, I used GIMP to remove the background and trim the image size.

And here’s my final product. Not bad for an amateur, if I may say so.
With the asset created, the next step is to get it imported into Unity and build a prefab. I took the usual steps for a new in-game object, giving it a collider, a rigid body, etc. I also made use of the existing player rocket asset to give the new missile its own fiery tail.
Next we work on the script.
Creating the script part 1 — Locking on
Before we do any further work, we’re going to want to create a new script for the missile but also copy over the code that is already in our laser script. The laser script basically does two things — it moves the laser, and it destroys the laser once it goes out of bounds. All of this functionality we’ll want for our missile straight away.
With that finished, we should have a “dumb-fire” missile that acts exactly the same as our laser. The next feature to implement is finding a target enemy and “locking on” to it.
For this, we will create a new script level variable to hold a reference to our target, and a method to determine our target. Within the method, we can easily get a collection of all the enemies on screen by using the FindGameObjectsWithTag method of the GameObject class. All of the enemy prefabs have the “Enemy” tag, so using this method provides us with all of the potential targets.
After all of the enemies are identified, the method then cycles through all of the enemies, determines which one is the nearest, and then sets that one as the final target.

Notice also that I have filtered out all enemies that return true from the built-in IsDead method for the enemies. The reason for this is that the enemy game objects still exist while their death animations are playing, so we want to ignore those.
I realize also that using the nearest enemy as target is not the most sophisticated approach, and can lead to some suboptimal situations. For example, an enemy that is just passing near the player will be targeted by the missile, but likely won’t be killed before it escapes off the bottom of the screen.
This is a good opportunity to consider different approaches for making the homing missile both more effective and more true to life. But for this example, I think just going with the nearest enemy accomplishes what we’re trying to learn here.
Creating the script part 2 — Chasing the enemy
Now we get to the really tricky part — making our missile pursue the enemy while also still behaving in a believable way. What do I mean by this? Well, to be honest, trying to make this homing missile script work properly took more than a few iterations on my part.
Since this is supposed to be a missile and not some kind of homing energy ball or other amorphous object, it was important for the missile to be facing the direction it is travelling. This means both rotating the object and making sure it doesn’t behave in strange ways while its moving.
While working on this problem, I saw everything from the missile not rotating at all to it spinning wildly in place. The most common error I noticed was when the missile missed its target, it often seemed to experience a sort of orbital drift back towards the target, causing it to move sideways. This was, of course, unacceptable.
I finally found success with this issue, but only after switching the missile to the rigid body method of movement. For everything else thus far, I had been making use of the Translate method of the various transforms in the game.
The rigid body method of movement is meant to be more physics based, potentially taking into account factors such as mass and drag. We don’t need to worry about those things though to use it. We do, however, need to do two things. First, we need a new script level variable to hold a reference to the object’s RigidBody2D component. Second, we need to change our script to use the FixedUpdate method instead of the Update method. FixedUpdate is tied to Unity’s physics system, which we’ll be making use of.
Now within the FixedUpdate method we need to do three things to make our missile work properly. The first thing is to update the “self destruction” code that we lifted from the laser object. It still works fine as is, but the laser could only travel straight up, while the missile could potentially travel in any direction. We need to make certain that any missiles that fly out of bounds get cleaned up.

The second issue to address is we need to completely overhaul the movement code. The call to the transform’s Translate method needs to go entirely, and then be replaced with an update to the rigid body component’s velocity.
This is actually just one line of code. We always want the missile to be travelling “up”. It just so happens that when we change the missile’s direction (our next step), we redefine what “up” is.

Finally, we need to make our missile steer itself towards its selected target. This actually involves some math, which I will attempt to explain as simply as possible.
Ultimately what we are looking for is what angle our missile needs to direct itself towards. To find this, we first get a vector showing us the direction we’re aiming for. This is found from the difference between the missile’s and target’s positions. Once we have that, we normalize that value to get a unit vector. We do that because all we want is just the direction to the target, not how far away it is.
Next we get the cross product of the direction vector and the missile’s heading. This gives us the magnitude of the angle the missile needs to redirect by. Finally, we multiply this value by the speed at which we want the missile to be able to turn and we apply this value to the object’s angular velocity, which causes the object to turn.

Notice also that we need to actually multiply the final angular velocity value by -1, because for whatever reason we actually get the inverse of what we want from the cross product.
We also need to check if there is a target in the first place, and if the target is still “alive” (the issue with the death animation, as mentioned earlier). If the target is not valid, the missile will simply move straight forward as it did before we added the homing aspect.

And here is the final product. The missiles do reliably pursue their targets, so that’s good! We do, however, see an amusing after effect where missiles that were targeting a destroyed enemy then proceed to fly around in circles. This is due to the fact that their angular velocities won’t change after the targets are destroyed and become null.
I can think of two easy to implement approaches to change the behavior of the missile when its target is no longer valid. The first potential approach is that we change the missile’s angular velocity to zero. This will cause any left over missiles to fly off in a straight line, and they may either collide with an enemy or fly out of bounds and self destruct. The second potential approach is to have the missile attempt to find a new target.
Either change is very easy to make. We just need to provide some logic for when the target is not valid.

I was getting good results from either change, but actually found that making both changes at once gave me the best results. When their prior targets were destroyed, the missiles would straighten out and then find new targets if possible.
Looking good! This was a challenging feature to implement, but I am super pleased with the end result.
In the next article, we’ll be returning to our ship’s thrusters feature to provide some limitations to that ability. Until then, good luck and happy coding!